Commercial Photography · Aerial Photography · Studio Rental · Classes |
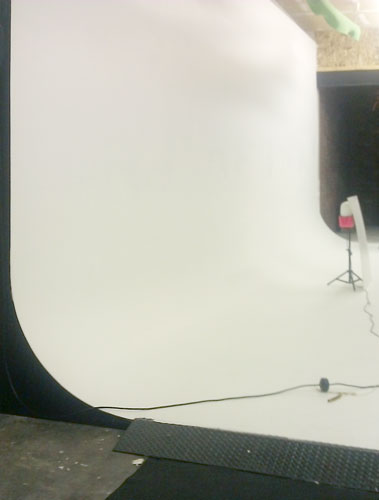
The most common question I get from people who first see my studio is something along the lines of "Do you skateboard on that thing?"
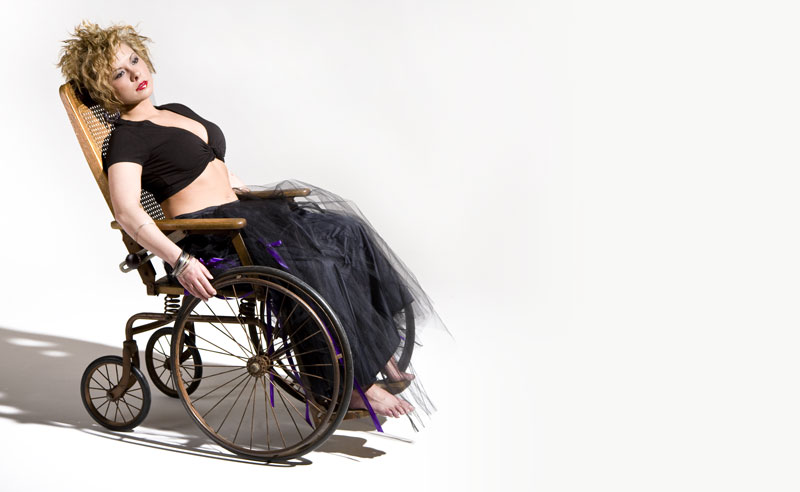
Well, no I don't, but you can see from the picture at left why they ask. It's actually way too tight a curve for skateboarding (30½ inch radius, vs 60 inch or more for boarding), too, but just right for my use. Technically it's called a "cyclorama" or, more commonly, a "hard sweep." It's job is to provide a smooth transition betwen wall and floor so that no corner or edge is visible. If lit properly, it can give the impresion of an infinite white plane which can give a very dramatic effect, as in the picture at the right. (And to answer a common question about that shot, no she's not really a parapalegic, this was just an artistic shot I did with local model Tiffany Burns.)
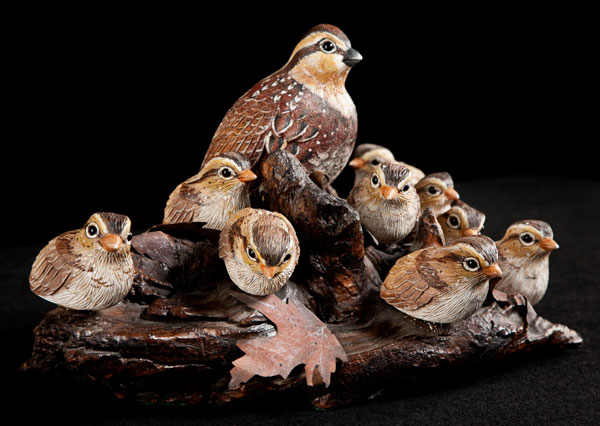
The studio contains two such sweeps - one white, the other black, which face each other. The sweeps are thirty-two feet wide and twelve feet high, and the walls are about thirty-nine feet apart. The black sweep is great for providing a completely dark setting, allowing the object to really pop out - for example local carver Randy Mayes' amazing bird sculptures like the quails at below left.
These two sweeps are easily the most-used areas in the studio, and almost any professional studio, whether for commercial work like I do or portraits, should have at least a white sweep (though many use seamless paper or a white muslin, canvas or vinyl backdrop instead of a "hard" sweep like mine). I use "soft" sweeps, too (fabric or seamless paper) for other colors, but white and black are such staples that it's best to have them always at hand and free from worries about wrinkles or tears. The only maintenance on these sweeps is keeping them clean. To some extent I can clean them like you would any painted surface, but for the most part when they get dirty, I just repaint them. Generally only the floor and maybe the curve need re-painting, and I can do that in an hour. As you might guess, I buy my white and black paint in five gallon buckets! The white cyclorama, in particular, must have twenty or more coats of paint on it by now!
So how do you make a hard cyclorama? And why is the radius thirty and a half inches? Well a little applied geometry will tell you that a radius of thirty and a half inches gives a quarter circumference (the arc of the sweep) of 47.91 inches - close enough to fourty-eight inches as not to matter. That's convenient because lumber (in particular, hardboard) comes in four by eight foot sheets. Thus a sheet on its side will just fit the curve between the flat floor and wall.
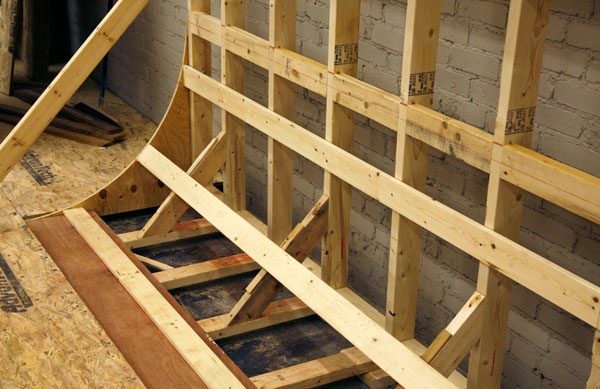
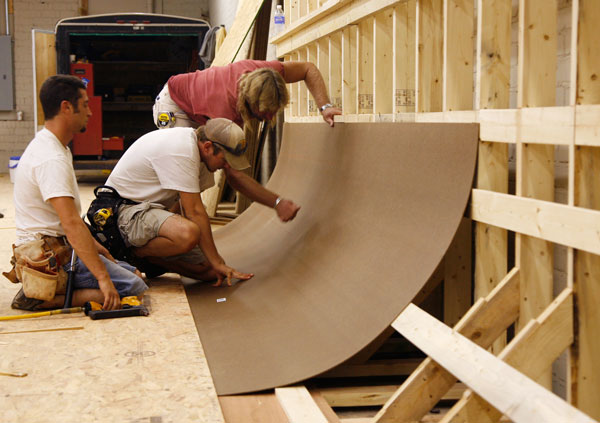
In my case, the floor is just a chipboard underlayment, and the wall is ordinary gypsum wallboard. The curved section is made of four layers of 1/8" hardboard (Masonite) laminated together to make a rigid ½" thick curve, matching the thickness of the wall and, with a ¼" shim, the thickness of the floor. The builders extended the floor to 30½" from the wall, added cross-braces to the wall 30½" from the floor level, added a quarter-inch shim where the floor met curve, and then made braces to fit the needed curve. Rather than a lot of math, this was done simply by cutting quarter-circle cutouts in plywood to make the end-pieces of the curve, and then placing the braces show they just touch that curve. See the picture below and on the right to see what I mean. These braces assure that the hardboard will follow the desired circular curve, and also provide some backing to it so rambunctious kids and the like don't destroy the sweep!
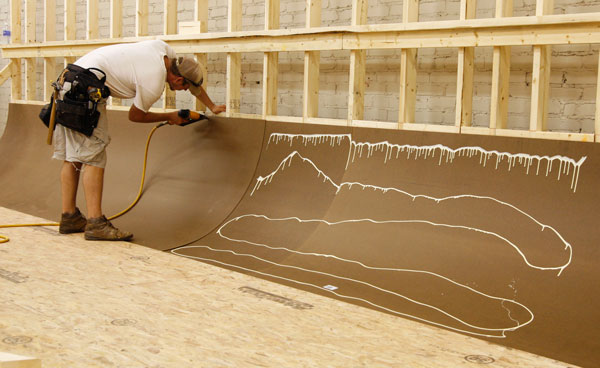
The first layer was then formed by butting a long edge of the hardboard agaist the floor and pushing down on the top (and in on the curve) until the hardboard touched all the supports and then tacking the top and middle with nails where they meet the braces (see next picture). Subsequent layers were then added (next picture) by gluing and nailing them to the lower layers. Care was made so that the seams between sheets did not line up in different layers to prevent weak spots. Finally the wall board was put up (the cross brace you see above the curve in the earlier shots was removed first).
The joints between the wall and the curve, basically flush, were taped and mudded, just like any wallboard seam. We found (the hard way) that this needed to be an elastic joint compound to avoid cracking, but since we put that on, there have been no issues in over two years of use. Kudos go to Marty and Dusty Baumgartner and John Wilkerson who created the design and built these sweeps, along with all the other initial construction in the studio. Their willingness to go beyond normal construction techniques really helped make the studio an incredible place to shoot!
So... no, it's not a half-pipe. It's a cyclorama, or hard-sweep, and now you know what it is, why it is, and how it was made! Next week, I plan to take a look at some more ads and why the photos in them do or don't work, and what can be done about it. As always, your questions, comments, suggestions, or whatever are very welcome. Drop me a line at art@artsmithphotography.com — I'd love to hear from you! Happy shooting!
-Art
Back to The Photographer's Journal
| ©2008 ArtSmith Photography, all rights reserved. | Home • Portfolio • About ASP • Capabilities • Pricing • Contact • Journal |